
Deploy AppDrag Websites on Vibecoder
Step 1 – Create an Elestio Account
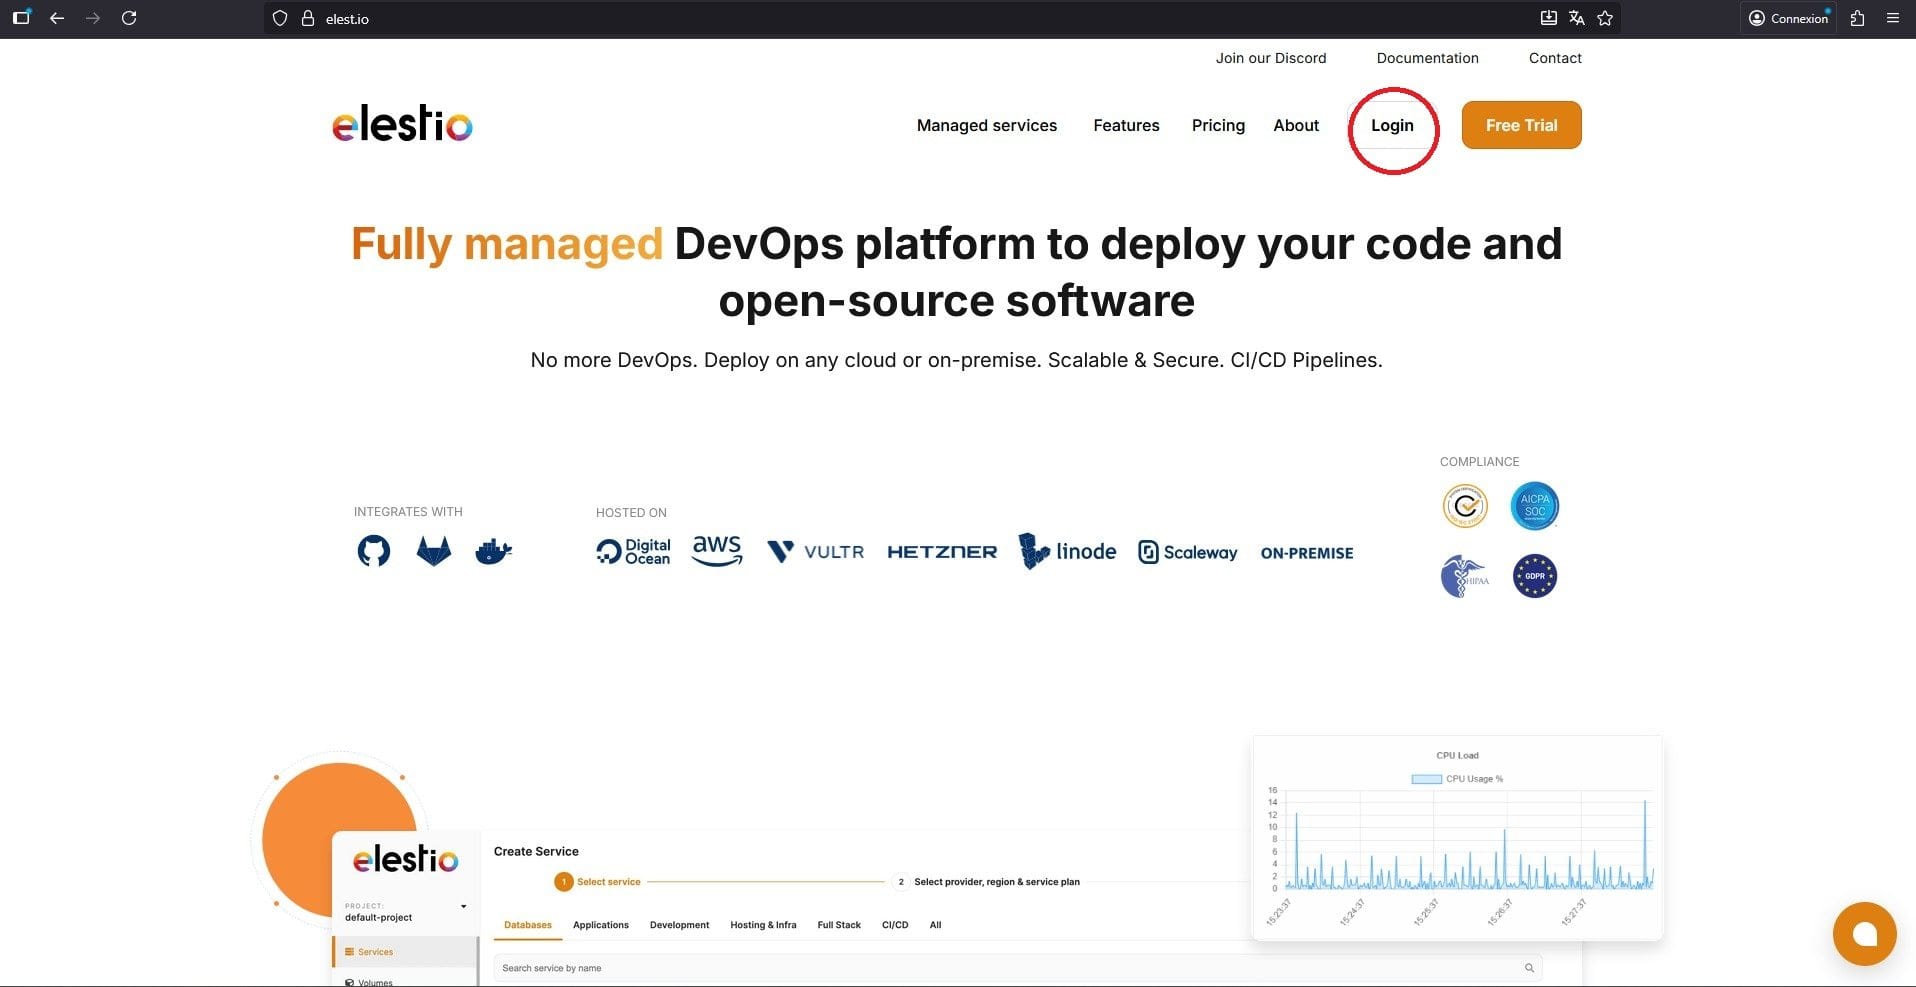
Go to https://elest.io/
Click “Login” in the top-right corner.
Sign up using your email, GitHub, or Google account.
Once logged in, you’ll access your Elestio Dashboard, where you can manage your services and servers.
Step 2 – Add Credits to Your Account

From the dashboard, look at the bottom left corner and click to add credits if you haven’t already.
We recommend adding $50, which should be enough to host one application for about three months.
💡 Tip: Use the promo code AppDrag10 when adding your first credits to get a 10% discount.
Step 3 – Create Your First Service
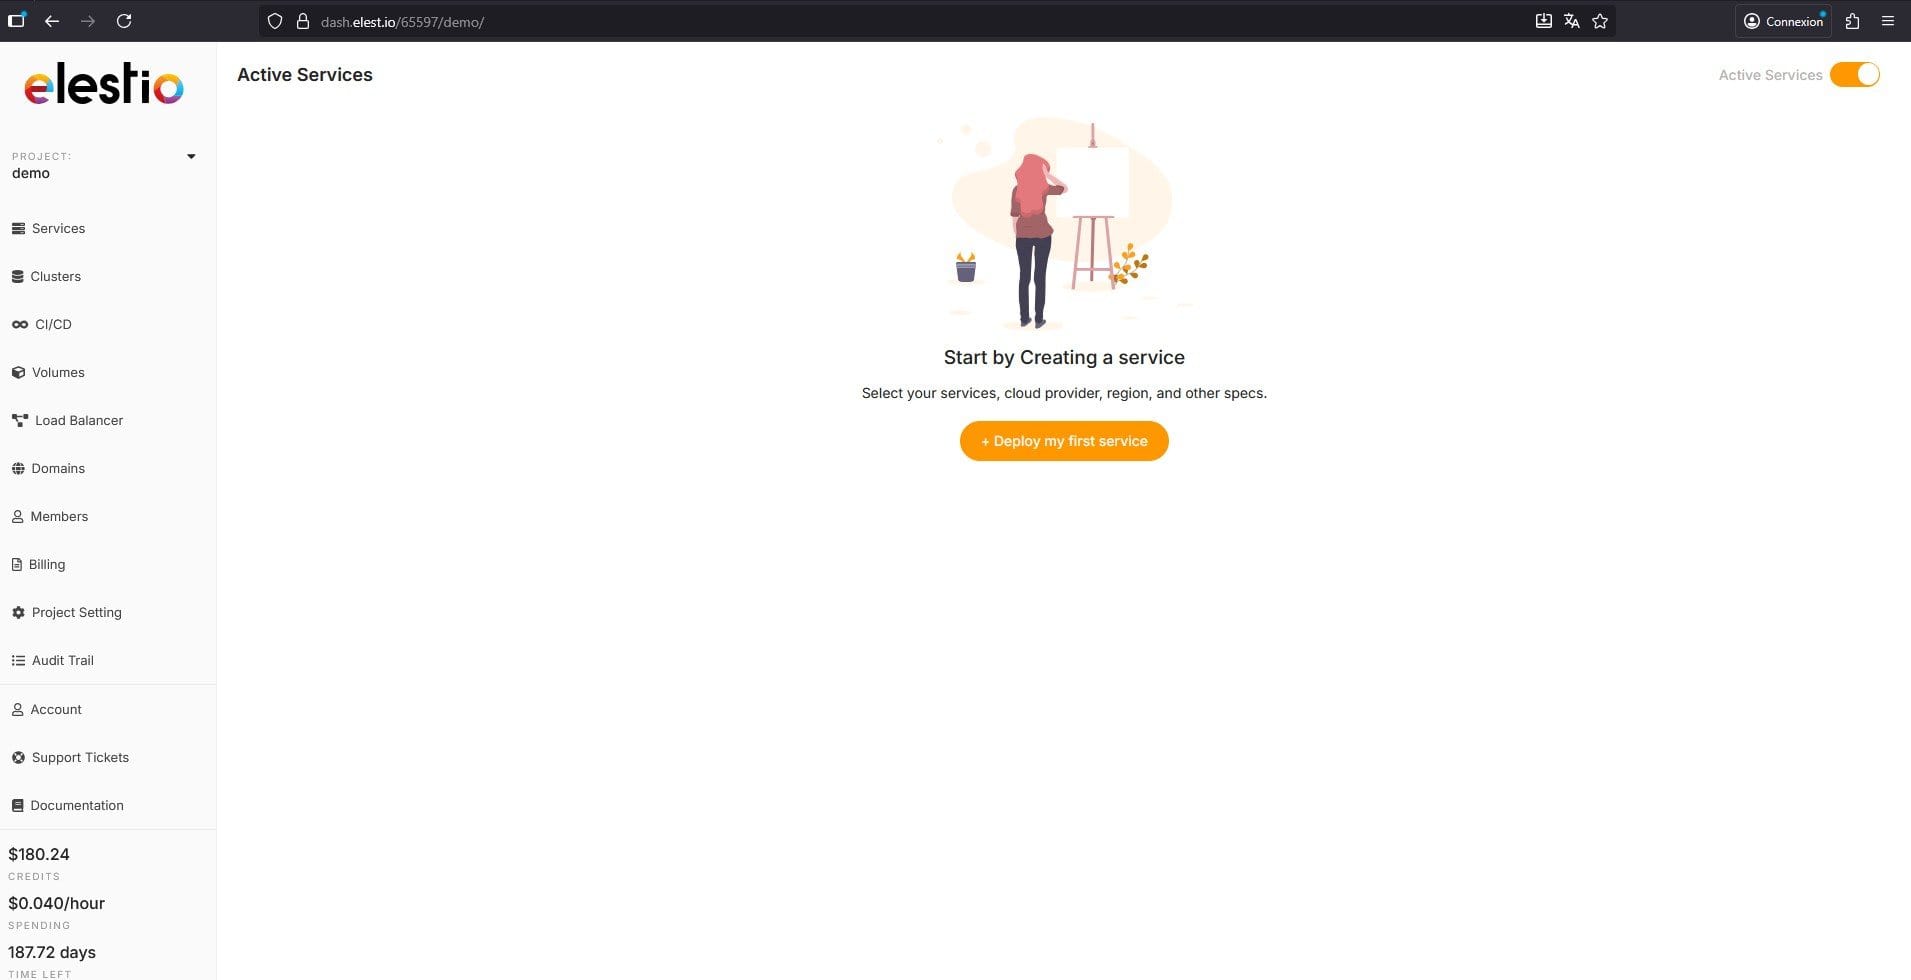
Click “Create a New Service” in the center of your dashboard.
Step 4 – Select Vibecoder
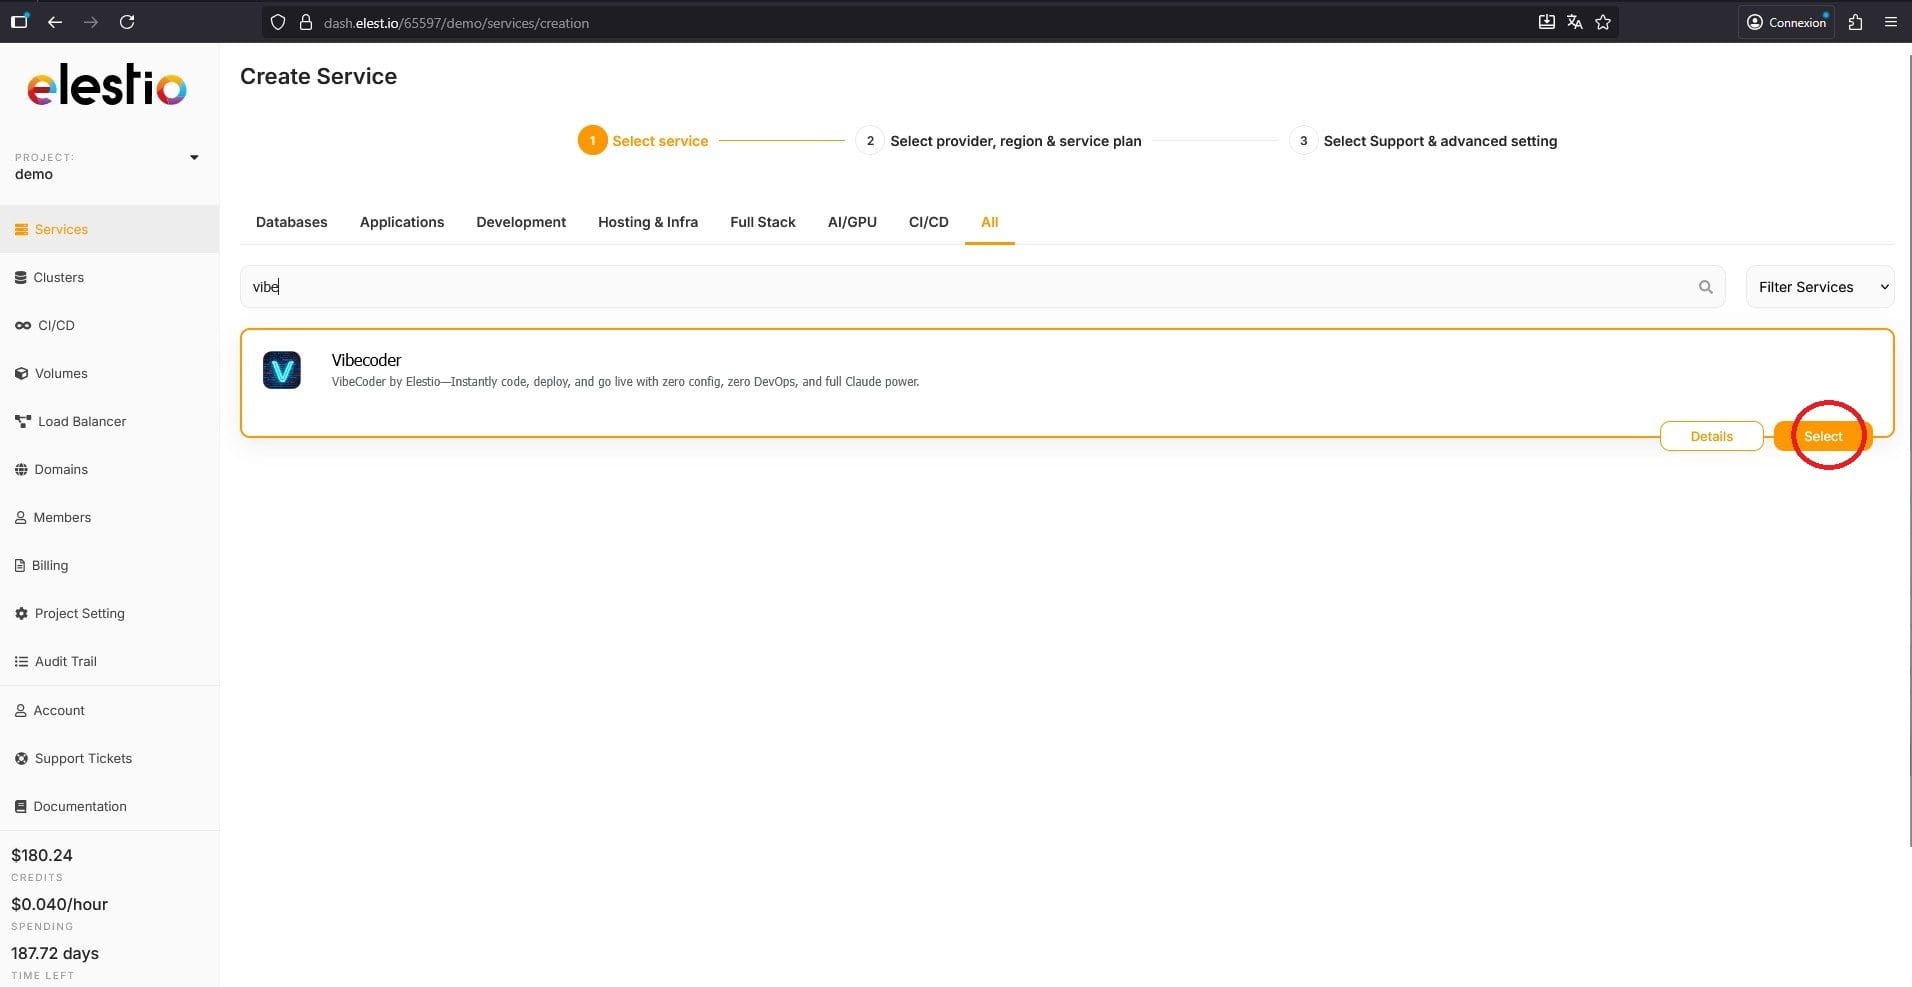
In the search bar, type “Vibecoder”.
When the result appears, click “Select”.
Step 5 – Choose a Cloud Provider and Configuration
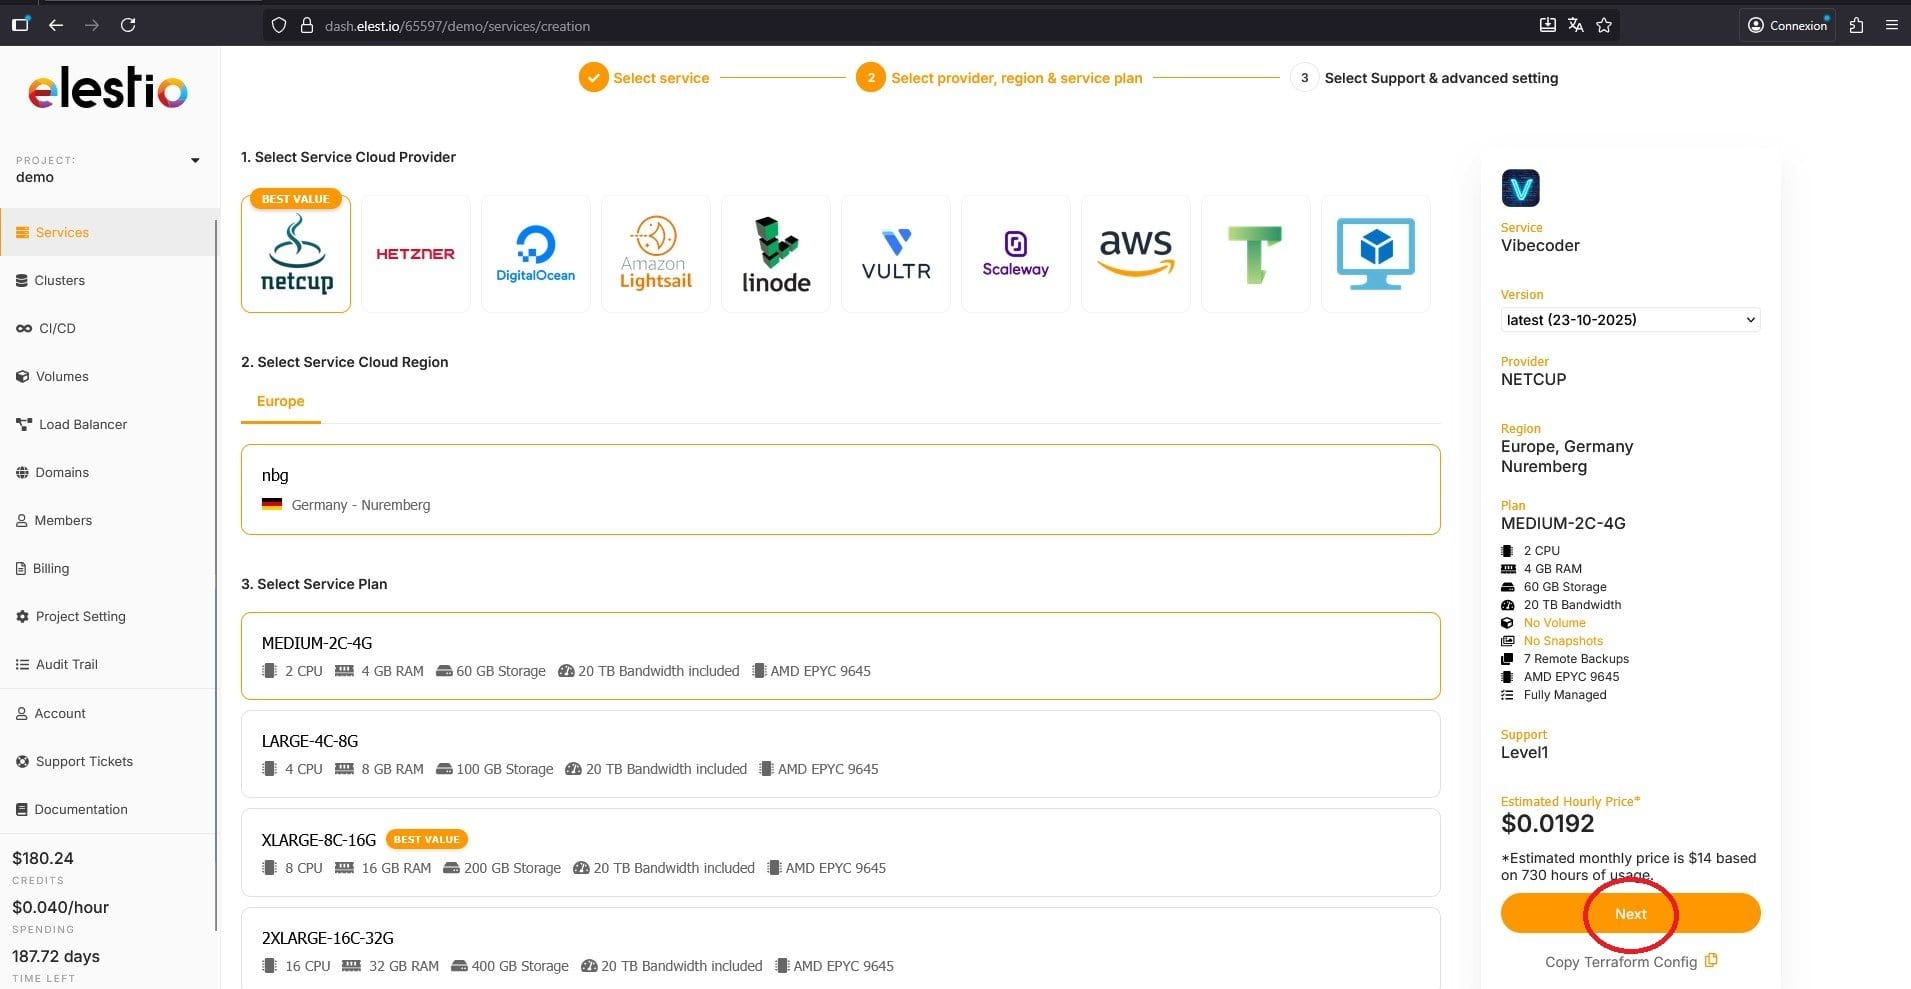
Select your preferred cloud provider.
We recommend Netcup for its performance and reliability.
Choose at least the Medium machine type (2 CPU, 4 GB RAM).
Click “Next” on the right side of your screen.
Step 6 – Name Your Machine and Choose Support Level
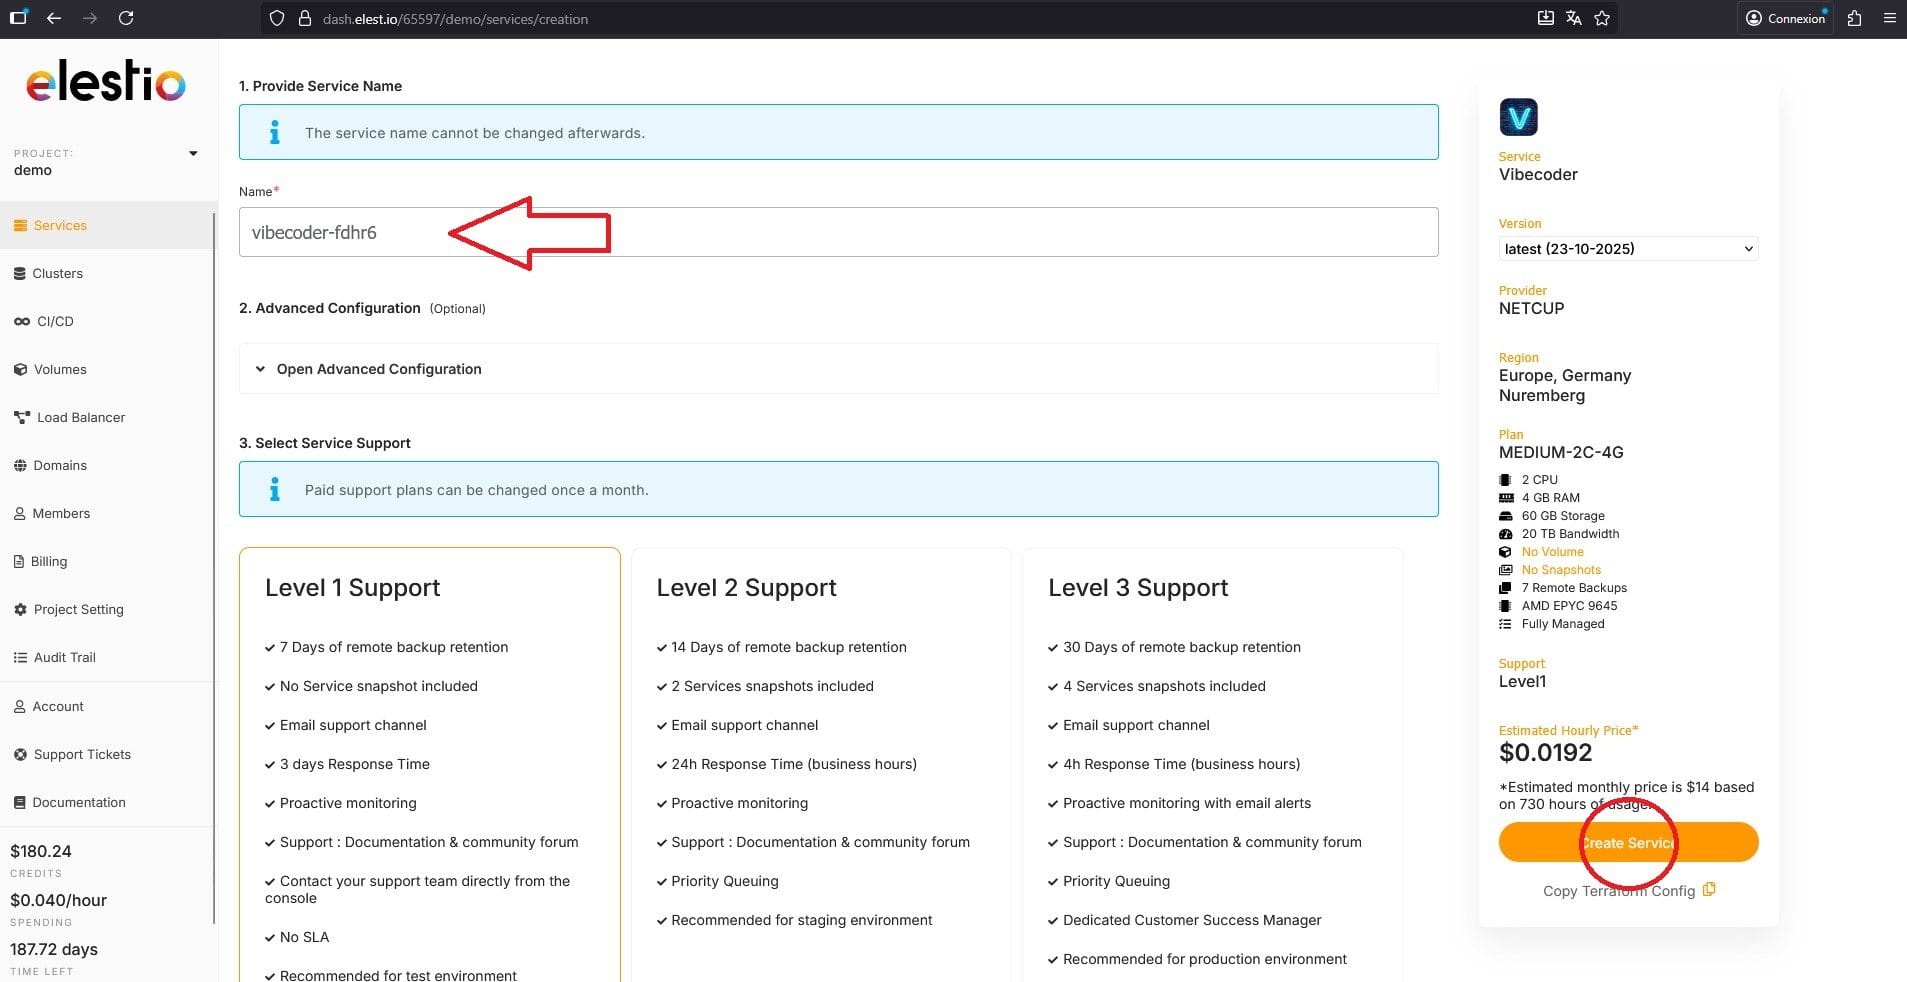
Enter a name for your machine (e.g., “vibecoder-appdrag”).
Select the support level you prefer depending on your needs.
Click “Create Service”.
Step 7 – Wait for Deployment
Elestio will now deploy Vibecoder on your new machine.
This process may take a few minutes.
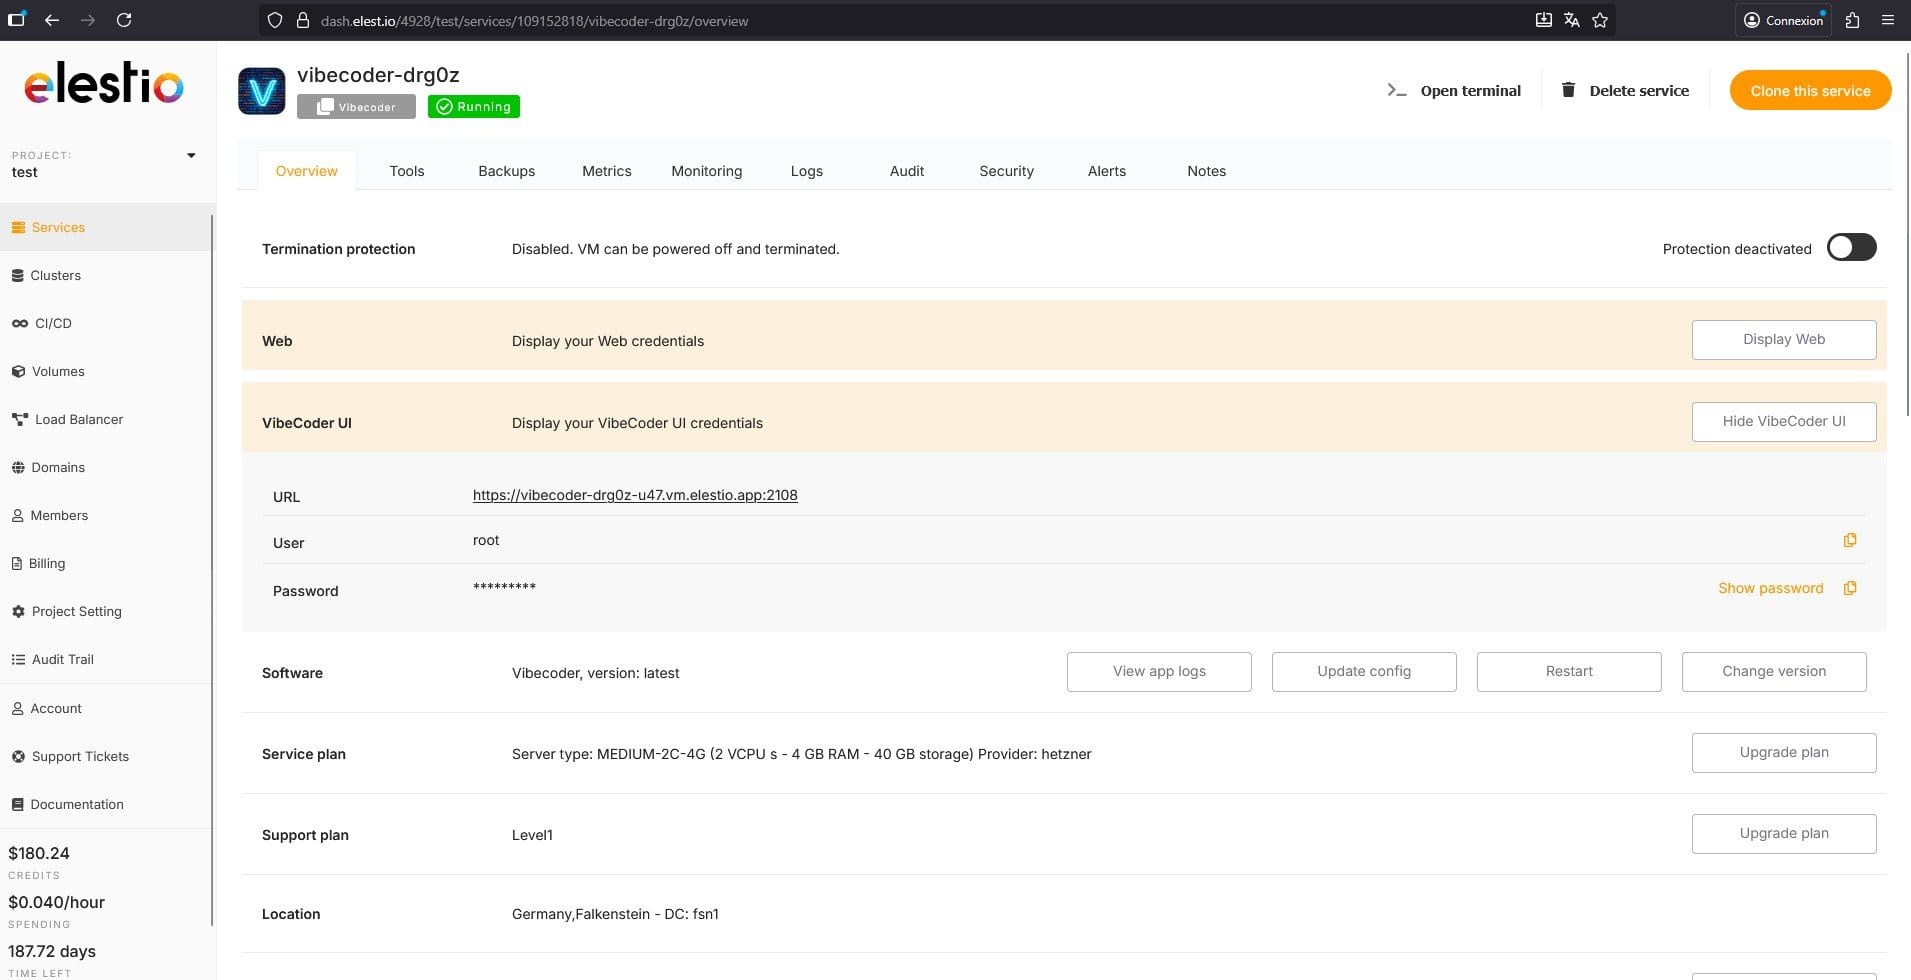
Once completed:
You’ll receive an email to connect on your dashboard to get vibecoder credentials.
The informations are available directly in your Elestio Dashboard (by selecting your new service).
Step 8 – Access Vibecoder
Open the provided URL, it will look like this:
https://vibecoder-XXXX-UXX.vm.elestio.app:2108
Each user has a unique address. Go to that URL.
Step 9 – Log In
Use the credentials sent to you by email (and available on your dashboard).
Step 10 – Set Up Two-Factor Authentication (2FA) for Vibecoder
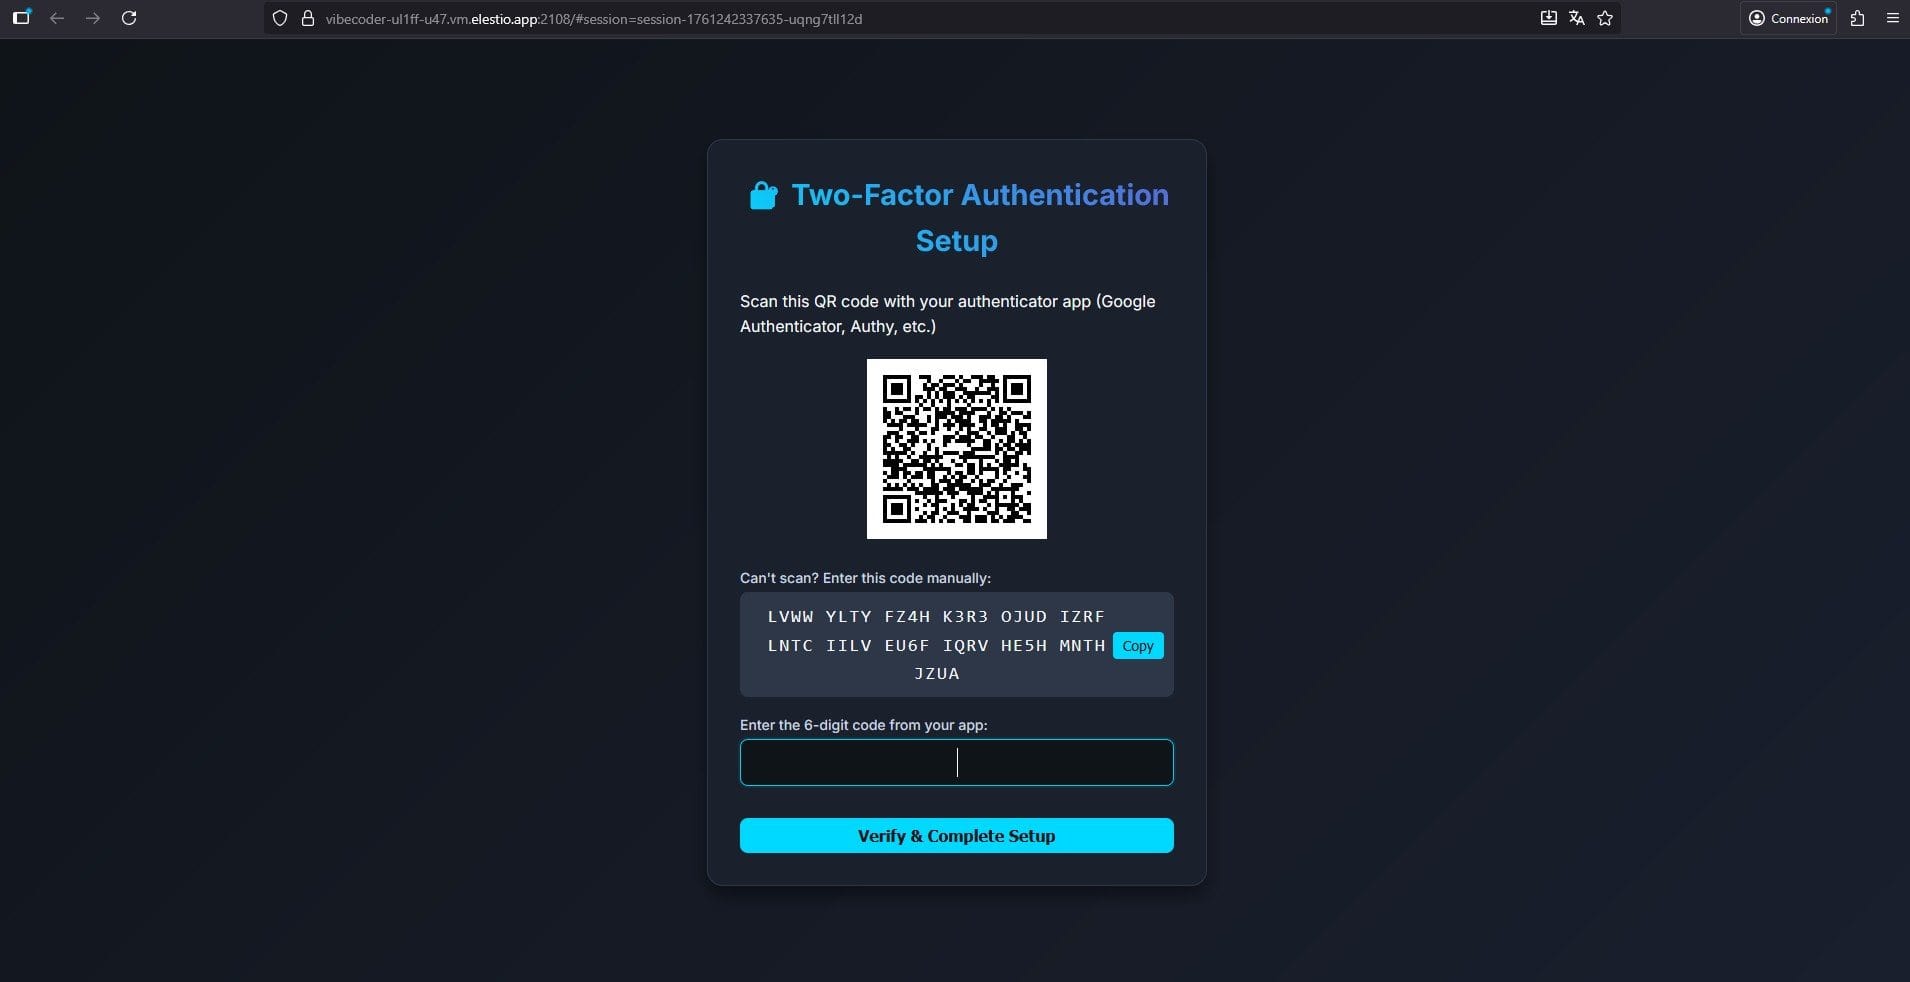
When prompted, create your 2FA code to secure your Vibecoder account.
Step 11 – Connect Your Claude Account
Go to https://claude.com and create an account if you don’t already have one.
Once your Claude account is ready, enter your Claude credentials in Vibecoder to connect it.
Step 12 – Upload Your AppDrag Project
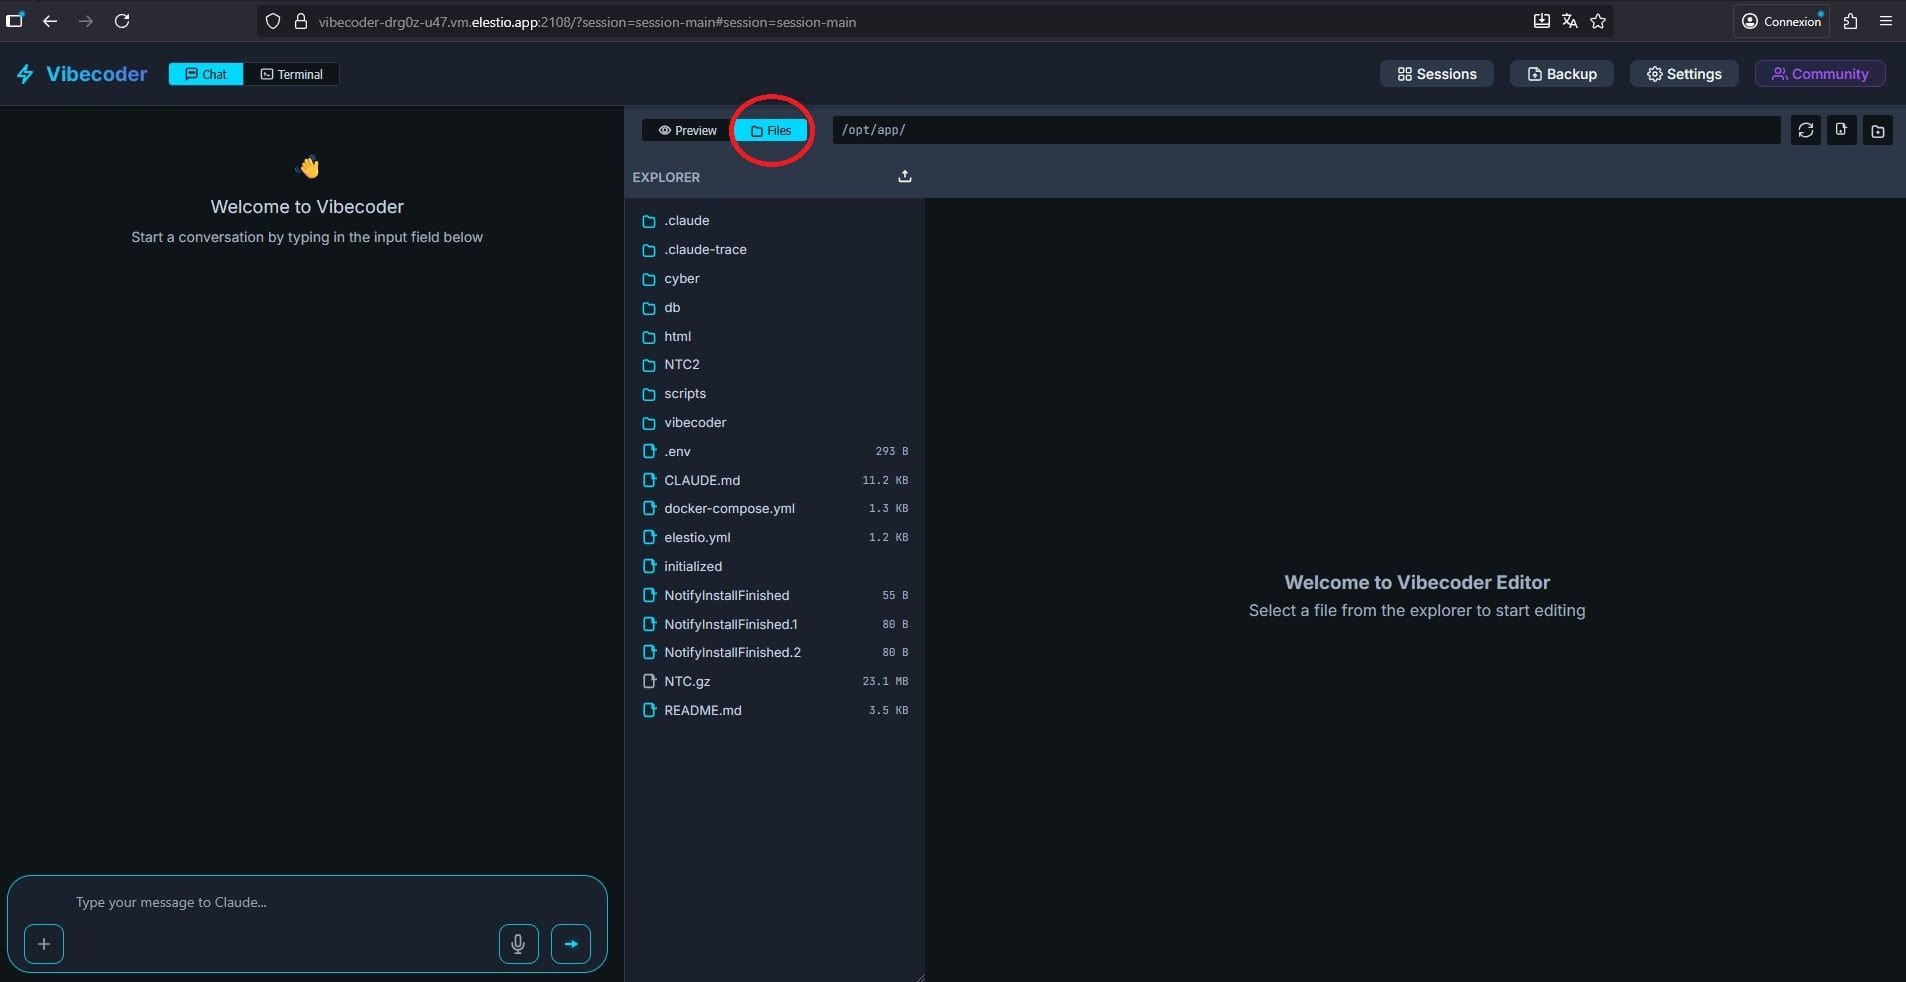
Once inside Vibecoder, go to the files tab and click the button to upload a file.
Select the AppDrag project archive you downloaded earlier (e.g., myproject.tar.gz).
Step 13 – Prepare and Launch Your App
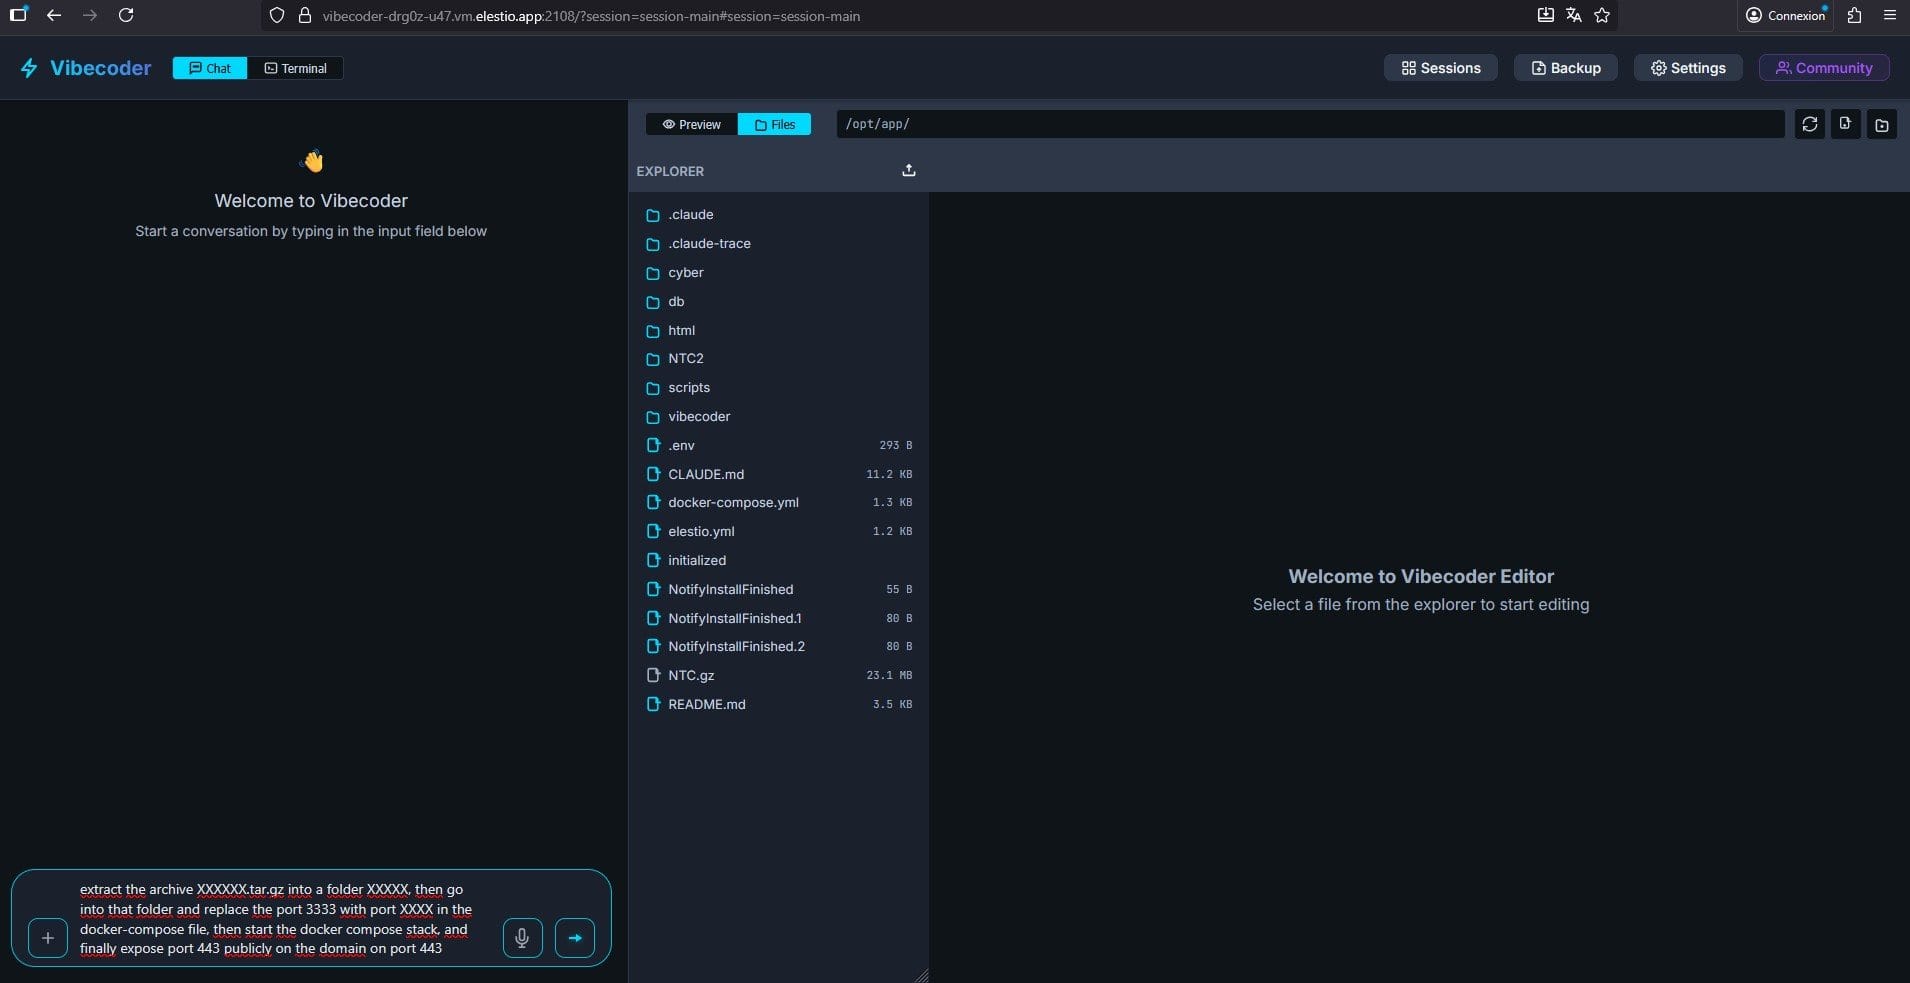
In the Vibecoder text console, type the following command — replacing the XXXX placeholders with your actual project details:
extract the archive XXXXXX.tar.gz into a folder XXXXX, then go into that folder and replace the port 3333 with port XXXX in the docker-compose file, then start the docker compose stack, and finally expose port 443 publicly on the domain on port 443
Step 14 – Connect a Custom Domain
You can connect your own domain name and secure it with HTTPS.
Follow the detailed steps in the official Elestio documentation here:
https://docs.elest.io/books/security/page/custom-domain-and-automated-encryption-ssltls
Once your DNS records are configured as explained in the doc, open Vibecoder and type the following prompt (replace the placeholders with your own details): for project XXX, expose the application running on port 3333 to port 443 of the domain YYYY.